
Holiday Cookie Week #4: Super Versatile Chocolate & Vanilla Sugar Cookies
I went overboard again, imagine that.

I saw this shirt the other day that said I have OCD (obsessive Christmas disorder). I’m waiting to receive it in the mail since it was clearly designed for me. Please tell me I’m not the only one who, more or less, loses ten years of maturity during the holidays.
It’s passing so fast though, I was hoping to have my gingerbread house done by now, but so many things have come up this week and I haven’t had time to work on it yet. I’m determined to make one though. It’s one of my annual traditions and even if I only have time to make a 2 inch tall one, it’s gonna happen. There has to be a gingerbread house.
But for now, you’ll have to settle for these cookies. My mom used to have a huge cookbook collection and every Christmas the shorter me loved to spend hours browsing the Christmas ones and looking at the same pictures I saw the year before. One of my favorites was the checkerboards in this one book and I have some really good memories of Mom helping me figure out how to make the design the right way.
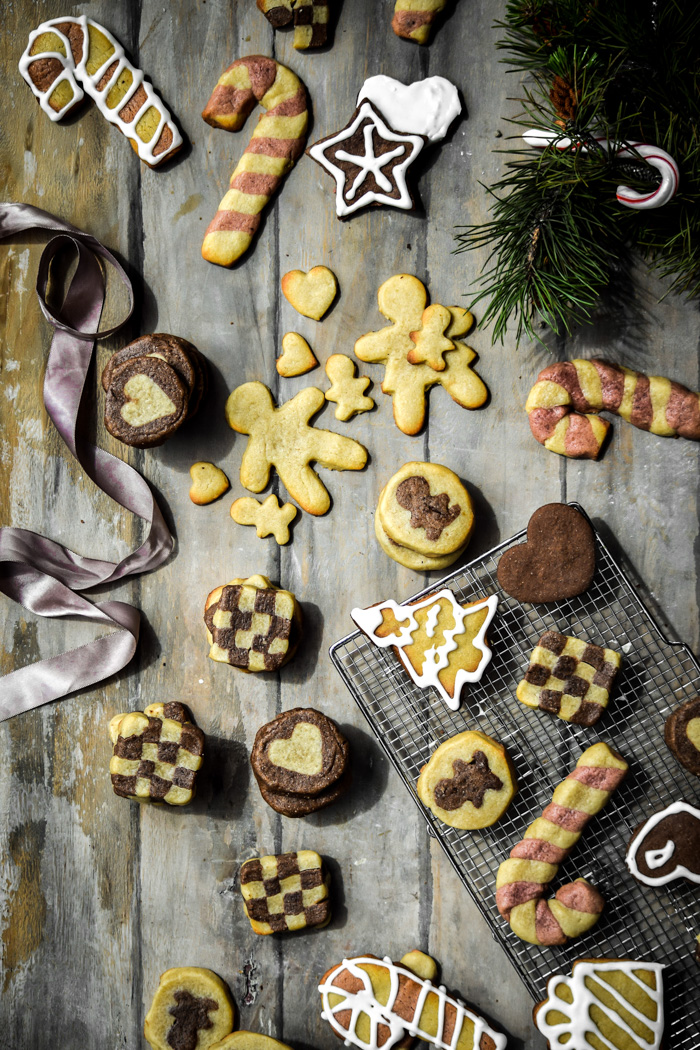
We sold or gave away all of those cookbooks when we moved though (I don’t actually own any cookbooks, are you shocked?) so I didn’t remember which book had that recipe. I decided to try to recreate it based on my rather extensive cookie-making experience and I think I got pretty close. Of course, once I had all this delicious cookie dough I realized how many shapes it could be made into and I couldn’t decide which ones to share. I did what I usually do and just shared them all because they were all so fun and festive, how could I pick?
The trickiest ones are the checkerboards, and I honestly didn’t give them my best effort, as you can see by my lopsided ones. I know, how could I not make them look better, they were only the entire inspiration for this post! You guys should fire me. In my defence though, these were batch number two. When I made the first ones my mom was meeting with some friends and asked if there were any sweets ready that she could take to share and I can never resist the pleasure of sharing cookies so my prototype checkerboards were devoured before their debut.

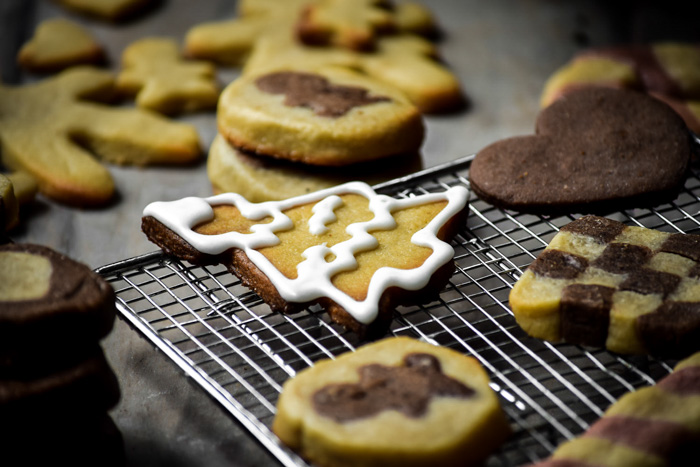
This sort of thing happens a lot but I wouldn’t have it any other way. Anyway, even though I failed with batch number 2, they are actually not that hard and they’re really fun. The best part is when you get to slice them and see your work paying off in the form of little checkerboards! I also loved the slice and bake. The trick to those is to let your inside shapes get frozen solid so you don’t mess them up when adding the outside dough.
I did do my best to describe the process for making each of these cookies, but I’m not always very good at that part so if you’re having trouble you can let me know and I’ll try to explain it better. Or (since I haven’t quite gotten around to making videos) you can search youtube for videos of how to do the kind you want to try.
I really should have made this easier on myself and just done plain old cut-outs, but my excitement for the season made me want to do everything at the same time. By the way, I know already have too many choices here but I forgot to make swirls. Just so you know, that’s also something you can do. All you have to do is stack two different colored rectangles and then roll them together into a log and slice the end. Voila, pinwheels!

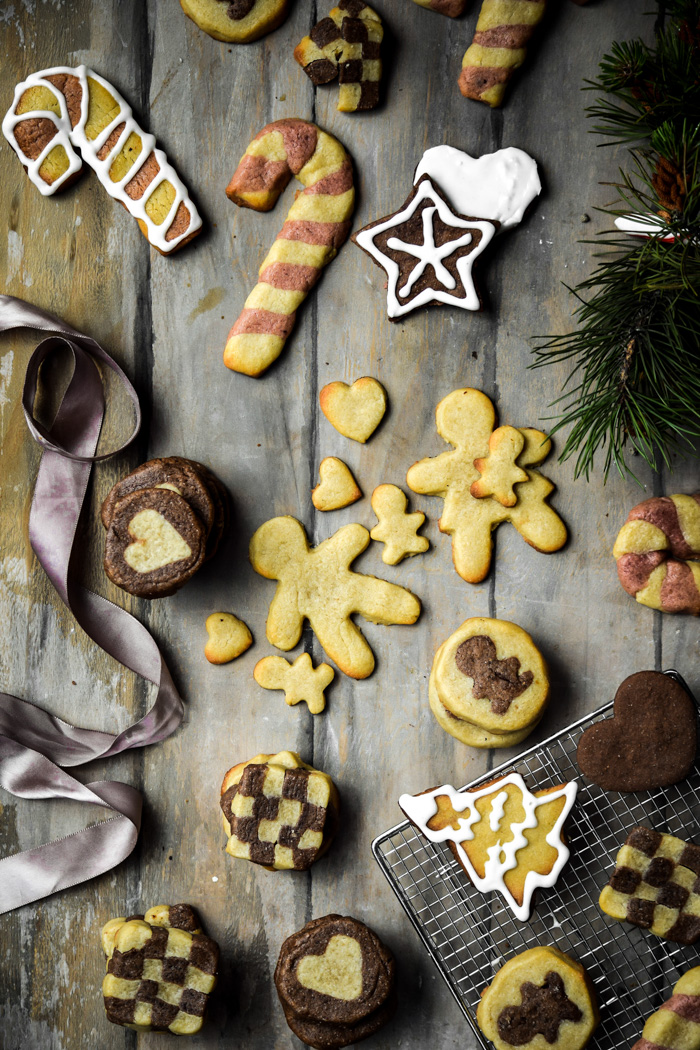
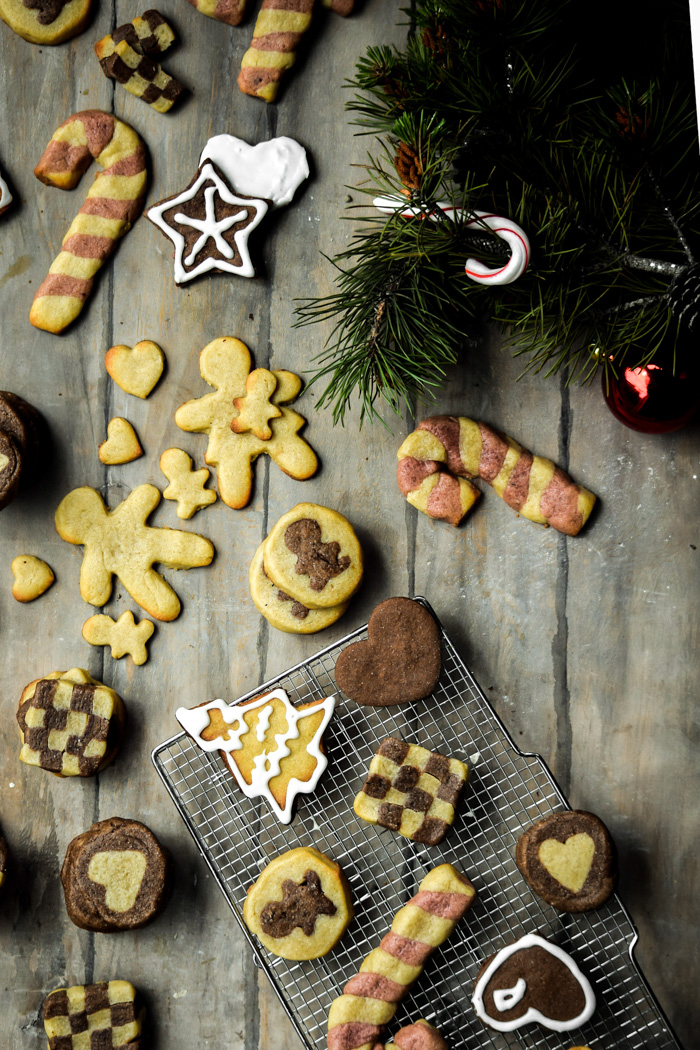
Oh, and speaking of the colors, I only made chocolate and vanilla and then added some red beet powder for the red in the candy cane cookies. You can use regular food dye, I just try really hard not to because I hate using that nastiness, although if you can find natural food coloring that’s great. I like the simplicity of the chocolate/vanilla contrast though. Do what you prefer, just make these because they are so, so good and they make everyone happy!

Super Versatile Chocolate & Vanilla Sugar Cookies
The holiday season has to have some pretty cookies! These cookies have become an annual tradition in my family.
Ingredients
- 1/2 cup organic vegetable shortening (or vegan "butter")
- 1/2 cup coconut cream *see note
- 1 cup sugar
- 2 teaspoons baking powder
- 1/2 teaspoon salt
- 2 1/2 teaspoons vanilla extract
- 1/2 teaspoon cream of tartar
- 2 1/2 cups all-purpose flour
Optional:
- 1/2 cup cocoa powder for chocolate dough (see note)
- 2 tablespoons dry beet powder for red dough (see note)
- 2 teaspoons a few drops of food coloring
Instructions
Dough:
-
Preheat oven to 350 F (180 C). Beat coconut cream, shortening, and sugar together until creamed (about 2 minutes). Mix in extracts and scrape the sides of bowl then sift in flour, cream of tartar, baking powder, and salt. Mix just until the flour is combined, trying not to overmix. Scrape the dough out of bowl and place on a lightly floured surface. Roll into a ball and flatten into a disc then place it on a large plate and cover with plastic wrap to seal. Chill the dough in the fridge for at least 30 minutes to make it easier to work with.
For Regular Cut-Outs:
-
Roll out dough on a lightly floured surface into a layer about 1/2 inch thick. Use a sharp knife or cookie cutters to cut into desired shapes.
-
Place cookies at least 1-inch apart on a parchment lined baking tray and bake for 8 to 10 minutes or until very lightly browned on edges. Remove from oven and cool completely. If desired, decorate with frosting and sprinkles. Store in an air-tight container for up to 1 week.
For Candy Cane Cookies:
-
Divide the dough in half. Set aside one half and mix 1 tablespoon dry beet powder into the other half (you may want to add more until you get desired color). Take about 2 tablespoons of each color dough and roll each into a snake/rope about 1/4 inch in diameter. Twist the two ropes together and shape one end into a crook like a candy cane. Cut of extra dough on ends and press cookie down with a flat sided tool (like a fondant smoother or a book) to flatten slightly. Place cookies at least 1-inch apart on a parchment lined baking tray and bake for 8 to 10 minutes or until very lightly browned on edges. Remove from oven and cool completely. Store in an air-tight container for up to 1 week.
For Slice and Bake Cookies:
-
Divide the dough in half. Set aside one half and mix 1 tablespoon dry beet powder, 1/4 cup cocoa, or a few drops of desired color into the other half (you may want to add more until you get desired color). Roll out dough on a lightly floured surface into a layer about 1/2 inch thick. Choose a cookie cutter that is about 1 inch tall and wide and cut as many of that shape out of desired color dough as you can and carefully stack them together horizontally on a parchment lined plate to form a "log" of chosen shape. Cover carefully with plastic and freeze for about 20 minutes. Meanwhile, roll a second color of dough into long snake/ropes about 1/4 inch in diameter and lay them side by side on your work surface. When your shape log is solid, remove from freezer and lay on top of dough ropes and lay some rope horizontally on top. Gently roll log back and forth to smooth and shape dough around frozen shape log evenly. You should have a long log of dough now. Wrap with plastic and chill in fridge for at least 30 minutes and up to 1 week.
-
When ready to bake, use a sharp knife to cut 3/4 inch slices and Place them at least 1-inch apart on a parchment lined baking tray. Bake for 8 to 10 minutes or until very lightly browned on edges. Remove from oven and cool completely. Store in an air-tight container for up to 1 week.
For Checkerboard Cookies:
-
Divide the dough in half. Set aside one half and mix 1/4 cup cocoa powder into the other half.
-
Now you want to make 2 equal rectangles. Roll the vanilla dough into a rectangle about 3/8 inch thick and cut into an 8x12 inch rectangle with squared corners; repeat this step for chocolate dough as well. Stack them together and align edges evenly. Cut in half and carefully lift one half on top of other (make sure to alternate the colors) and, again, align corners.
-
Now cut through top of your four-layer rectangle to make 3/8 slices with a sharp knife. Alternate colors and lay slices on their side in stacks of 4 and align edges. You should have about 5 logs of dough with checkered ends now. Place them on a parchment lined tray and wrap gently but tightly in plastic and place in fridge to chill for at least 30 minutes.
-
When ready to bake, use a sharp knife to cut 3/4 inch slices and Place them at least 1-inch apart on a parchment lined baking tray. Bake for 8 to 10 minutes or until very lightly browned on edges. Remove from oven and cool completely. Store in an air-tight container for up to 1 week.
Recipe Notes
For colored dough this recipe uses 1/2 cocoa, 2 tablespoons red beet powder, or a few drops of desired food coloring. However, if making the chckerboards, candy canes, or slice and bakes, you will want to divide the dough into sections and only add a fraction of cocoa or coloring. You can do it by dividing the recipe or simply by eye. Feel free to leave a question in the comments.
*If you have trouble finding coconut cream at your local grocery store it's completely fine to use full-fat coconut milk and scrape the cream off of the top. Just be sure that it's cold enough to separate.


5 Comments
Madeline
These look beautiful! I think it’s totally okay if we act like children during Christmastime–it’s the best time of year to relive those memories and just spend time with family! : )
Tori
Thanks, Madeline!
Thalia @ butter and brioche
I actually don’t have a good sugar cookie recipe.. so definitely need to try this one out! Xx
Tori
Well in that case, I hope you LOVE these Thalia! Thanks Girl!
Aria
Why, oh why have I never had checkerboard cookies before? Must. Make.